Flash vs natural light

AA5Q2020_02-14-2014.jpg

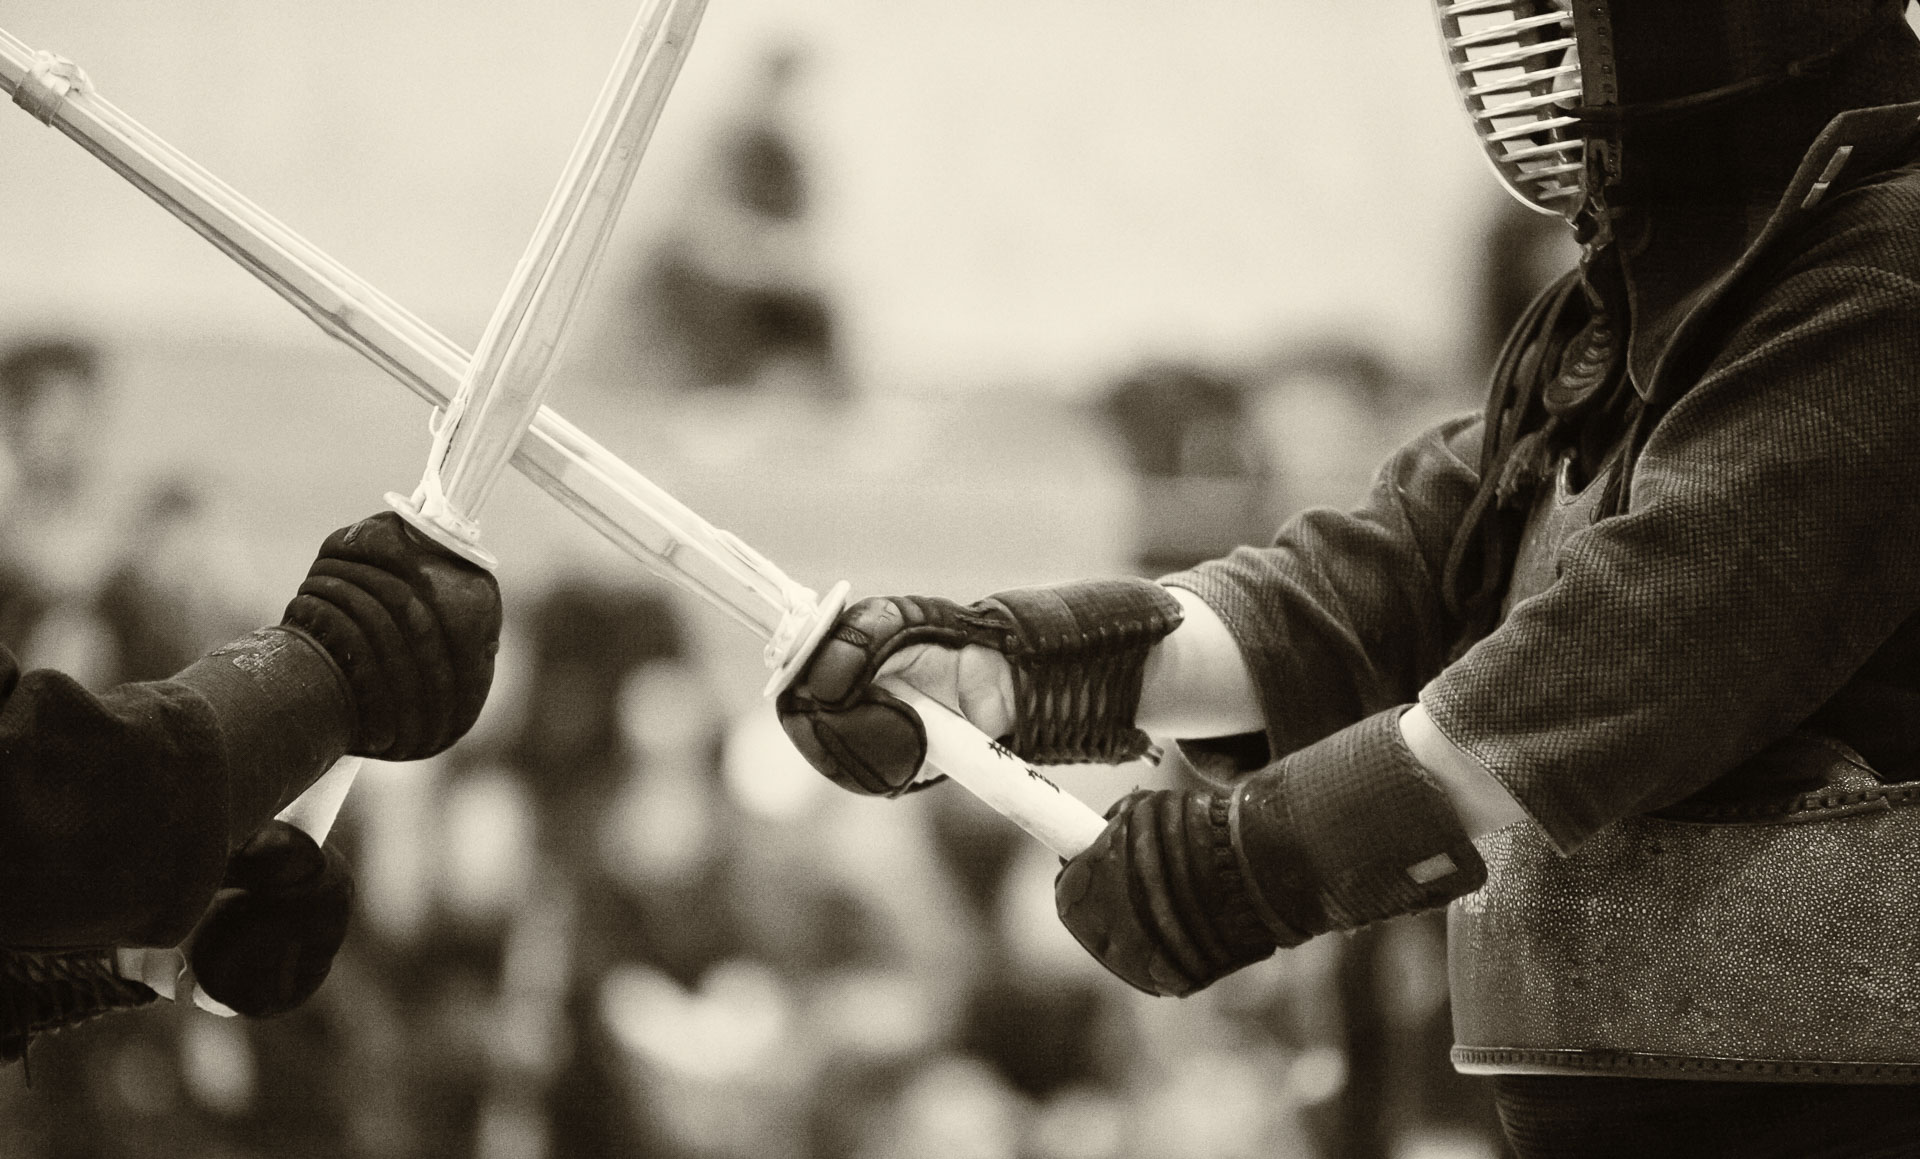
The choice between natural light and flashes is an important decision in photography. Sometimes, the choice is easy – the flash is simply not allowed in many venues, such as museums, or at certain sporting events, such as swimming and martial arts competitions.

There are many good reasons for foregoing the flash: it disturbs the participants of the event, the referees, the audience, interferes with the photo-finish equipment and destroys the ambiance of the natural light. Another advantage of using just the natural light is the unmatched flexibility due to the  lack of strobes, light stands, light modifiers, cables and triggers (here is an example of a starter kit, but there is not limit to how complex a lighting setup can become). Being nimble is particularly important for sports photography. Often, it makes a difference between capturing the key shot that tells the story of the game or missing it.

More photos here: http://ow.ly/Ci0o7

The obvious downside of natural light photography is, potentially, high noise levels in the photos. Fortunately, modern DSLRs, such as Canon EOS-1D X or a more affordable Canon EOS 5D Mark III (Nikon’s counterparts are Nikon D4S and Nikon D810) handle high ISO very well, i.e. with fairly limited noise. Besides, noise can be somewhat controlled in post-processing.

On the other hand, the advantage of using strobes is not only the additional amount of light that they provide, but also total control of the lighting conditions that they enable. As a friend of mine remarked recently, using studio lights makes one learn about the light much faster than using the natural light alone. To me, this is a sufficiently good reason to use the lights, despite their cost, the inconvenience and even despite occasionally missing a shot. On the balance, I think both flash and natural light photography have their place, and both have been incredible fun to learn.

Dressing for the weather

_MG_3530_01-31-10-Edit.jpg

Dressing according to the weather when shooting outdoors may seem like an obvious thing to do, but it is easy to under-estimate how cold and/or wet it can be outside when packing for the shoot in the warmth of the house. Having appropriate clothes can definitely make a difference between an enjoyable and miserable shooting experience, but even in terms of photography itself, having an extra reserve of comfort often gives me that extra bit of patience that is necessary for waiting for the perfect shot or for trying another vantage point or focal length or exposure time.

Being able to try different types of shots or just being patient enough to wait for the perfect conditions is particularly important for night photography. The photo of the the Temple Bar at night (see above) is one of my personal favourites from my sabbatical in Ireland back in 2010. I took this long exposure shot on a very cold January night. Despite being very substantially bundled up, I waited for the lonely motionless woman to be separated from the passing crowd for such a long time, all the while experimenting with different exposure times to get the motion blur “just right”, so by the the time of this shot my fingers were in excruciating pain, and I was just about to call it a day (the knowledge that only a few steps separated me from the warmth of the pub and the comfort of a pint of Guinness was only adding to the test of my will).

Likewise, during the rowing photo shoot a few weeks ago, by the end of the rainy day, only one layer or dry clothes separated me from being quite happy with the all the action shots and probably leaving early (and likely, sick) without the best photos.

More photos here: http://ow.ly/v6rpb

I find that the most important cold-weather clothes are:

  • Shoes. I find that a good pair of hiking boots works best for most situations.
  • Gloves. Recently, I bought a pair of HEAD Digital Sport Running Gloves, which I find excellent for photography, because they have silicone bumps on the palm side that are not too thick, but just substantial enough to really improve the grip. These gloves also work on the touchscreen of my iPhone. One note for size selection: the material is somewhat stretchable, so it’s good to err on the smaller side.
  • Hat. A toque works great for me.
  • Base layer. I like a merino wool top, because it can be worn as a turtleneck without the top layer is needed. The bottoms are also a must for me in cold weather.
  • Mid layer. I like mid layers without pockets, because I almost always wear a shell on top.
  • Jacket. I like a wind-proof shell with pockets and a hood.
  • Pants. Most often, I wear jeans or ski pants.

Note: The links above are affiliate links – they point directly to Amazon.

Black background: controlling the light

AA5Q0961_11-15-2014-BW.jpg

The dance studio photoshoot this weekend took place in a large room with a black curtain on the back. Armando and I set up four strobes surrounding the subjects (a group of children), and another strobe fitted with a large softbox directly in front and overhead of the subjects, as the key light. Even though the background curtain was black, it did have folds, wrinkles, etc., so it was important to make sure that no light fell on it in order for the background to come out completely black. I set my Canon EOS-1D X in manual mode with ISO 100, f/10 and 1/200 sec, so that ambient light was not registering at all. In order to avoid spilling the light on the background, we turned the two strobes located closest to it away from the curtain, so that they faced the camera and illuminated the subjects from behind. We used parabolic reflectors with honeycomb grids on these strobes to focus their beams.

The other strobes were turned towards the background, so to avoid illuminating it, we took advantage of the large size of the room and positioned the subjects sufficiently far from the background, so that the light from the strobes would fall off and would not reach the curtain. To have more control of the light direction, we put strip banks (a rectangular grids on soft vanes) on the front to the softboxes. This way, all the lights coming from the front were soft, but still relatively focussed.

AA5Q1013_11-15-2014-BW.jpg

One surprising feature of the dance floor, which is basically a matt black material with a texture somewhere between plastic and rubber, is that it is not so matt, but rather quite reflective under the strobe lights. We did not want the light themselves reflecting in the floor, so we tilted the softboxes  slightly upward. The reflections of the subjects, on the other hand, looked very nice, and I tried to make them part of the composition whenever possible.

The floor was also scuffed everywhere by the dancers’ shoes, and every scuff mark was prominently visible in the photos. In the past, I used to spend substantial amounts of time removing the most prominent scratches from the floor in Photoshop, but after reviewing many photos, I now think that the beaten-up floor adds authenticity to the shots. It conveys that the photos were taken not in an artificial environment of the photo studio, but in the actual dance school, where children spend a lot of time practicing their art.

Collaborating with clients: developing the shoot list

AA5Q1116_11-15-2014-BW.jpg

In preparation for the photo shoot for an advertisement campaign of a local dance school, I set up a shared Pinterest board, where the director of the school, my wife  and I pinned photographs with ideas on the poses, lighting and makeup. The basic concept for the ad campaign is to show a child in dance attire, surrounded by a group of children in everyday clothes, to convey that some kids “stand out of the crowd” because of their interest in dancing. Personally, I like this idea, because I can relate to it as a parent. My daughter has been drawn to images of dance since she was about 1.5 years old – before she could actually dance. We first noticed that she was completely immersed in a “Tales of Beatrix Potter” ballet shown on screen in the gift shop of the Palais Garner in Paris.

While the general theme of the ad campaign is well-defined, coming up with a shoot list is somewhat challenging, as it needs to address the expectations of the clients (there are two school co-owmes, who have complementary, i.e. slightly different, ideas for the key shots), my own ideas, and logistical constraints. As we began planning the shoot couple of weeks ago, it became apparent, that shooting with a group of 3 -8 year-olds on location (as we originally wanted) would be beyond what we could attempt within the given timeframe and budget. Thus, our posing and lighting ideas naturally narrowed down to ones that would work in a studio.

AA5Q1222_11-15-2014-BW.jpg
I find that inviting clients to share their ideas with me before the shoot is tremendously helpful, not only because it gives me a better opportunity to address their needs (after all, this kind of photography is part art and part service), but also because it helps them refine their own ideas of photos they would like to have. This doesn’t mean that they have to find and pin the exact shot they like – the idea of their ideal photo can be a combination of various aspects (lighting, pose, costume, etc.) of other images, or it can even form by means of eliminating what they don’t like.

Having a collection (“board” in Pinterest terms) of the images that contain elements that I want to capture/replicate in the shoot also allows me to show it to the  models (say, on an iPad), which saves enormous amount of time and effort at the posing stage. This is particularly helpful with amateur models, who, unlike pros, do not have a readily accessible arsenal of poses that they could repeatably produce.

The more my photo projects shift towards people photography, the more I find that involving other people as early as possible, as well as throughout the project, enables an enormous improvement of the quality of the final product and of the experience of the shoot itself. It is as if the creative and technical tasks become distributed among a team of people, who are very motivated and bring a variety of perspectives to the project.

Shooting mode for action photography: Aperture priority vs Manual

AA5Q9948_04-19-2014.jpg

When photographing fast action, such as sports or dance, I usually concentrate on two technical aspects – capturing the expression of the motion and isolating the subject from the surroundings.

To show motion in a still photo, I typically try to freeze it, i.e. to shoot with sufficiently fast shutter speed, so that the athletes appear sharp, but their poses and facial expressions convey movement and emotion.

An alternative to freezing the motion is to blur it, with a slow shutter speed, so that the moving subject is smudged, while the surroundings are sharp. Blurring the motion is particularly effective when combined with a flash that illuminates the subject just before the camera shutter closes, freezing that phase of the movement (so called back-curtain sync).

Yet another approach is panning, when the camera follows the moving subject, and the image is taken with a shutter speed that is short enough to freeze the motion, but long enough to blur the background. This technique requires a lot of practice, and the success rate is typically very low. Also, it can only be applied in situations when the subject is moving more or less parallel to the sensor of the camera. If the subject is moving towards or away from the camera, it cannot be followed by swinging the lens around.

To isolate the subject from the background, I shoot with a fast lens, such as Canon EF 300mm f/2.8L IS USM or Canon EF 35mm f/1.4L USM, wide open, so the background is blurred because of the shallow depth of field.

PO-IMG_1460_12-07-13.jpg

To freeze the motion and blur the background, I need to control both the shutter speed and the aperture at the same time. Before upgrading my camera to Canon EOS-1D X, I used to shoot sports in aperture priority mode. I would select the maximum aperture (lowest f-number) and a sufficiently high ISO value, so that the camera would choose a fast shutter speed. Occasionally, the shutter speed would drop too low, and the image would end up blurry.

With a 1D X, I shoot in manual mode, where I set both the aperture and the shutter speed. I let the camera select the ISO by setting it to “A” (auto). This way, the only aspect that is left up to the camera is the amount of noise in the photo. I find that even if ISO ends up being very high (the selectable range can be specified in the camera settings – see page 13 of the 1Dx manual), the 1D X controls the noise very well. Besides, the noise can be controlled in post-processing to some degree.

Portrait retouching: skin smoothing in Photoshop

AA5Q2800_10-28-2014-Edit.jpg

In order to make skin in portraits appear smooth, I have been learning skin painting using “sample and paint” method in Photoshop. It is, basically, sampling the colour and painting a neighbouring skin area repeatedly, while preserving the texture detail of the original image.

Here is a step-by step-procedure:

  1. Open the image in Photoshop.
  2. Make a new layer (Shift-Option-Command-N). Let’s refer to it as Skin Painting Layer. We will be painting on this layer.
  3. Above the Skin Painting Layer, make another layer (Shift-Option-Command-N). Let’s refer to it as the Texture Layer, since it will be used to add texture to the areas of the Skin Painting Layer that will be re-painted.
  4. Create “Stamp visible” on the Texture Layer (Shift-Option-Command-E).
  5. Change the blending mode of the Texture Layer from Normal to Overlay.
  6. Desaturate the Texture Layer (Shift-Command-U or select Image > Adjustments > Desaturate from the top menu bar) because we only need to add texture to the Skin Painting Layer, not the colour.
  7. Make the Texture Layer into high-pass layer, which will enable extracting the details. From the top menu bar, select Filter > Other> High Pass.
  8. Select the Radius value of around 4 pixels. This can and should be adjusted later, when the Skin Painting Layer has some painting done. The goal is to match the texture of the painted-in skin areas match the texture of the rest of the skin.
  9. Clip Texture Layer ayer to the underlying layer (Skin Painting Layer), making it visible only where the underlying layer is visible. Right-click the Texture Layer and select “Create clipping mask“. The shortcut is Option-Command-G. This will add the texture from the original image only to the areas of the Skin Painting Layer that have been re-painted.
  10. Switch to the Skin Painting Layer by clicking on it.
  11. Select a brush tool and choose a soft round brush.
  12. With a brush tool selected (the shortcut is “B“), hold Option key and click the skin area to sample the colour. Release Option key and paint the neighbouring skin area (that needs smoothing) in a couple of short strokes. Repeat the sampling and painting procedure everywhere, where skin smoothing is required. I find it convenient to use the brush size that is approximately equal to the area that is being retouched (e.g. large for the forehead, smaller for the eyes, etc.) Other brush settings are as follows:
    1. Mode: Normal.
    2. Flow: approximately 10%. This low flow value makes each bush stroke add only a very subtle effect, making the whole process more controllable (it is very easy to inadvertently go overboard with retouching and ruin the image).

Note: I am using a Wacom Intuos Tablet; it would be very inconvenient to do this type of retouching using a mouse.

Recently, I have been using a combination of this technique and some high-level retouching using Portrait Pro plug-in, which I apply on a separate layer, with a layer mask that I can paint on to control where the effects of the plug-in are visible. Generally, I find that in order to avoid a cookie-cutter, “filtered” look, I need to touch nearly every part of the photo with a brush at some point during post-processing. Of course, this is not feasible for larger photo sets, but optimizing the workflow is a whole other story – something that I constantly keep in mind nowadays.

AA5Q0931_07-08-2014-Edit.jpg

Combining window light with strobes for portraits

AA5Q0944_07-08-2014.jpg

A large window at midday is a great light source for portraits. During a staged wedding photo shoot at the Empress hotel last  summer, I had a chance to combine window light with studio strobes. The colour matching between the natural and artificial light sources is not an issue, since “standard” studio light is daylight-balanced.

When the model is extremely close to the window, as in the photo above, the backlight provided by it is very intense, and it is easy to blend it with the strobe light. I shot this portrait at f/4.0 and 1/200 sec (ISO 200), which gave correct exposure for the window light. A single strobe fitted with a large softbox provided the light from the opposite direction. The resulting lighting arrangement is, essentially, equivalent to “cross-lighting”, when the model is located between two light sources of equal strength that are aimed at each other. The light distribution on the model is then controlled by her position relative to the imaginary line connecting the two light sources (if the model is located behind the lights, she is largely lit from the from the front; if she is mostly in front of the lights – she is backlit).

The difference between cross-lighting and the window-softbox arrangement is that in the latter case the light sources are, effectively, very large. This results in contrasty light (deep shadows, bright highlights) that, at the same time, has soft transitions between light and dark areas.

In contrast, the image below is shot with window light only. No additional strobes or reflectors were used to fill in the shadows. The dynamic range of this scene is quite high, but even when exposing for the highlights (so that they would not end up over-exposed), my Canon EOS-1D X fitted with a 85mm f1.2L II USM lens was able to capture some details in the shadows.

These two relatively easy lighting setups give completely different feels to portraits. Personally, I like the subtleness of natural light, and not having a strobe makes the shooting process more flexible and intuitive. However, without a flash to balance the window light, the range of poses that can be explored is fairly limited. Basically, the model has to be facing the window, or at least be partially turned towards it. With a flash, variety of poses is possible, including portraits with the window as a background.

AA5Q1298_07-08-2014-Edit.jpg

Live concert and performance photography

AA5Q4391_02-01-14.jpg

For live concerts, the choice of gear is very important, and it is primarily dictated by the extreme low-light conditions. I wrote about dealing with dimly lit environments, such as restaurant interiors, but a live performance adds an additional challenge of fast action. Using flash is obviously not an option, as it would interfere with the performance and even if it would be allowed, it would destroy the dramatic character and ambiance of the stage light.

The most important piece of equipment is the lens. It needs to be “fast”, i.e. have a large maximum aperture, and it needs to be sharp at that maximum aperture, because I really want to shoot it wide open. In my experience, as a minimum, an f/2.8 lens is required, such as the Canon EF 70-200mm f/2.8L IS II USM (I shoot Canon, so this lens is my workhorse, by Nikon has a counterpart for nearly every lens I mention, for example, Nikon 70-200mm f/2.8G ED VR II AF-S). For even better results, I often use still faster prime lenses, such as the 35mm f/1.4L USM, which is good for wider overview shots, or the spectacular, unique-to-Canon 85mm f1.2L II USM. The latter lens not only gathers enormous amount of light at f/1.2, but also produces very pleasant background blur (bokeh), which is great for isolating the subject from the background.

AA5Q6677_05-14-2014-Edit.jpg

Even with a fast lens, I have to shoot at a very high ISO (around 16,500) in order to keep the shutter speed high for freezing the action. Fortunately, modern professional DSLRs, such as the Canon EOS-1D X or Canon EOS 5D Mark III, have excellent low-light performance (i.e. relatively low levels of noise at high ISO).

My camera settings (on a 1D X) are usually the same as for indoor sports: manual mode with the aperture wide open, the shutter speed of around 1/800 sec and auto ISO.

One note is that the 85mm f1.2L lens is perfect for close quarters, but would be too short in larger venues. In any case, in line with what I wrote about involving other people in photo shoots, it is always best to develop a relationship with performers or the organizers of the event and obtain an accreditation or some sort or permission to be close to the action, either in front of the performers or backstage.

AA5Q5039_05-07-2014-Edit.jpg

On contrast in macro photography: using props and backgrounds

5DM2_MG_5406_10-20-12-Edit.jpg

In macro photography, achieving substantial depth of field is an inherent challenge. In fact, there is often no other way of getting the entire subject in focus, but to assemble the final image in post-processing as a composite of photos, each focussed on a different part of the subject. Thus, a background in a typical (non-composite) macro photo is often completely blurred. Nevertheless, the choice of the background is very important for the overall impact of the photo. Generally, I try to select the background so that its tone would contrast with the subject’s (i.e. the subject would be light on dark or vice versa). The colour of the background depends on whether I want to achieve more contrast or complement the subject. Often, the tonal contrast with the subject is sufficient, and I would use a complementary to the subject or neutral (such as black or white) background. If I do need colour contrast, I usually try to avoid using basic colours (red-green, orange-violet, etc.) and instead use a warm-cool hue of the same colour, which produces a more subtle result.

5DM2_MG_5575_11-01-12-Edit-Edit.jpg

The surface on which the subject is placed is also important. Typically, I like when its texture contrasts with the subject. For example, rough, textured surfaces, such as wood or stone, work well with highly-polished objects, such as jewellery or glassware. A notable exception to this is using reflecting surfaces underneath highly-polished or metallic objects, which is also very effective.

Also, I find that adding props often greatly enhances a macro photo. In order for the props not to compete with the subject, I try to place them so that they would be slightly out-of-focus, which is easy to achieve because of the shallow depth of field feature of macro photography mentioned at the beginning of this post. To me, the interesting aspect of macro photos is that they reveal the details that are not normally visible to the human eye but also hint on the story of the object, how it might be used, its history or cultural references.

Romance

As far as the equipment, I use a Canon EF 100mm f/2.8 Macro USM Lens on a 5D Mark II body. The lighting is usually provided by three studio strobes (the link is to a starter kit on Amazon, not the actual lights I have) triggered either with a PocketWizard or optically, with an on-camera 580EX II Speedlite or an infrared transmitter, as I described in this post.

Choosing a lens for portraits

AA5Q9154_06-19-2014-Edit.jpg

I think there is not single lens that would work equally well for all situations and any kind of portrait. Today, a friend asked my opinion on which lens would be better for a head-to waist portrait in terms of the background blur: a 200 mm f/2.8 or an 85 mm f/1.4. This is an interesting question, as one of the lenses has wider maximum aperture and the other one has longer focal length. Both of these parameters affect the depth of field the same way – increasing either the focal length or the aperture, while keeping other parameter the same, makes the depth of field shallower (thus increasing the background blur). To what degree these parameters affect the depth of field is more difficult to say without doing a rigorous cross-comparison of the lenses. So probably, there background blur would be comparable for the two lenses.

There is another factor to consider when choosing between these lenses – the distance between the camera and the subject. For a head-to-waist portrait, I would prefer a 200 mm lens, as it would make me shoot from farther away, which would result in more flattering facial features. Generally, the closer the camera to the subject, the more prominent the protruding parts of the face (mainly, the nose) are. Subconsciously, most people find smaller noses more attractive. This is a gross generalization, of course, but it is, generally, a fact. it is based on the tendency of humans to associate smaller noses (and larger eyes, for that matter) with young age. The longer lenses compress the perspective in the image, so the noses appear not as prominent as in portraits shot from a closer distance with wider lenses.

AA5Q6892_09-28-2014-Edit.jpg

I use a Canon camera, so for me, the lens of choice for portraits is a 70-200mm f/2.8L IS II USM (a Nikon equivalent is a 70-200mm f/2.8G ED VR II AF-S). Sometimes, I have a chance to use a 85mm f1.2L II USM lens. It is wider than the 70-200mm, but the bokeh produced by the f/1.2 aperture is just incredible and is well worth the inconvenience of the fixed focal length. This lens is unique lens to Canon; the closest Nikon counterpart is a 85mm f/1.4G AF-S.