Finding time for photography

Ponte Vecchio

All the things that are worth doing, take time. (I’d like to credit someone for this quote, but too many people said it.) Photography for me is a part-time pursuit, so finding time to do it seriously has not been trivial. However, it hasn’t been particularly difficult either. How can this be? Actually, photography is naturally integrated in most of my activities, both within and outside work.

The main part of my work is academic research in fluid mechanics. In my lab, we use flow visualization (photography of fluid flows). While the goals are far from artistic (we measure forces on submerged objects, etc.) and the techniques are highly specialized (we use lasers as light sources, for example), the basic concepts are the same as in conventional photography. So there is considerable cross-pollination between my interests in experimental fluid mechanics and taking pictures.

Family activities are even more easily connected to picture-taking. Photography gives focus to our vacation trips. It keeps us closer to our families and friends all over the World. Sharing my photography skills with friends feels good, because there are not many other options to give something as a gift, without buying it. Photographs are something of value that I can create myself. Hopefully, this makes them more personal as a gift. So doing photography while spending time with family and friends does not take away from personal time, but enhances it.

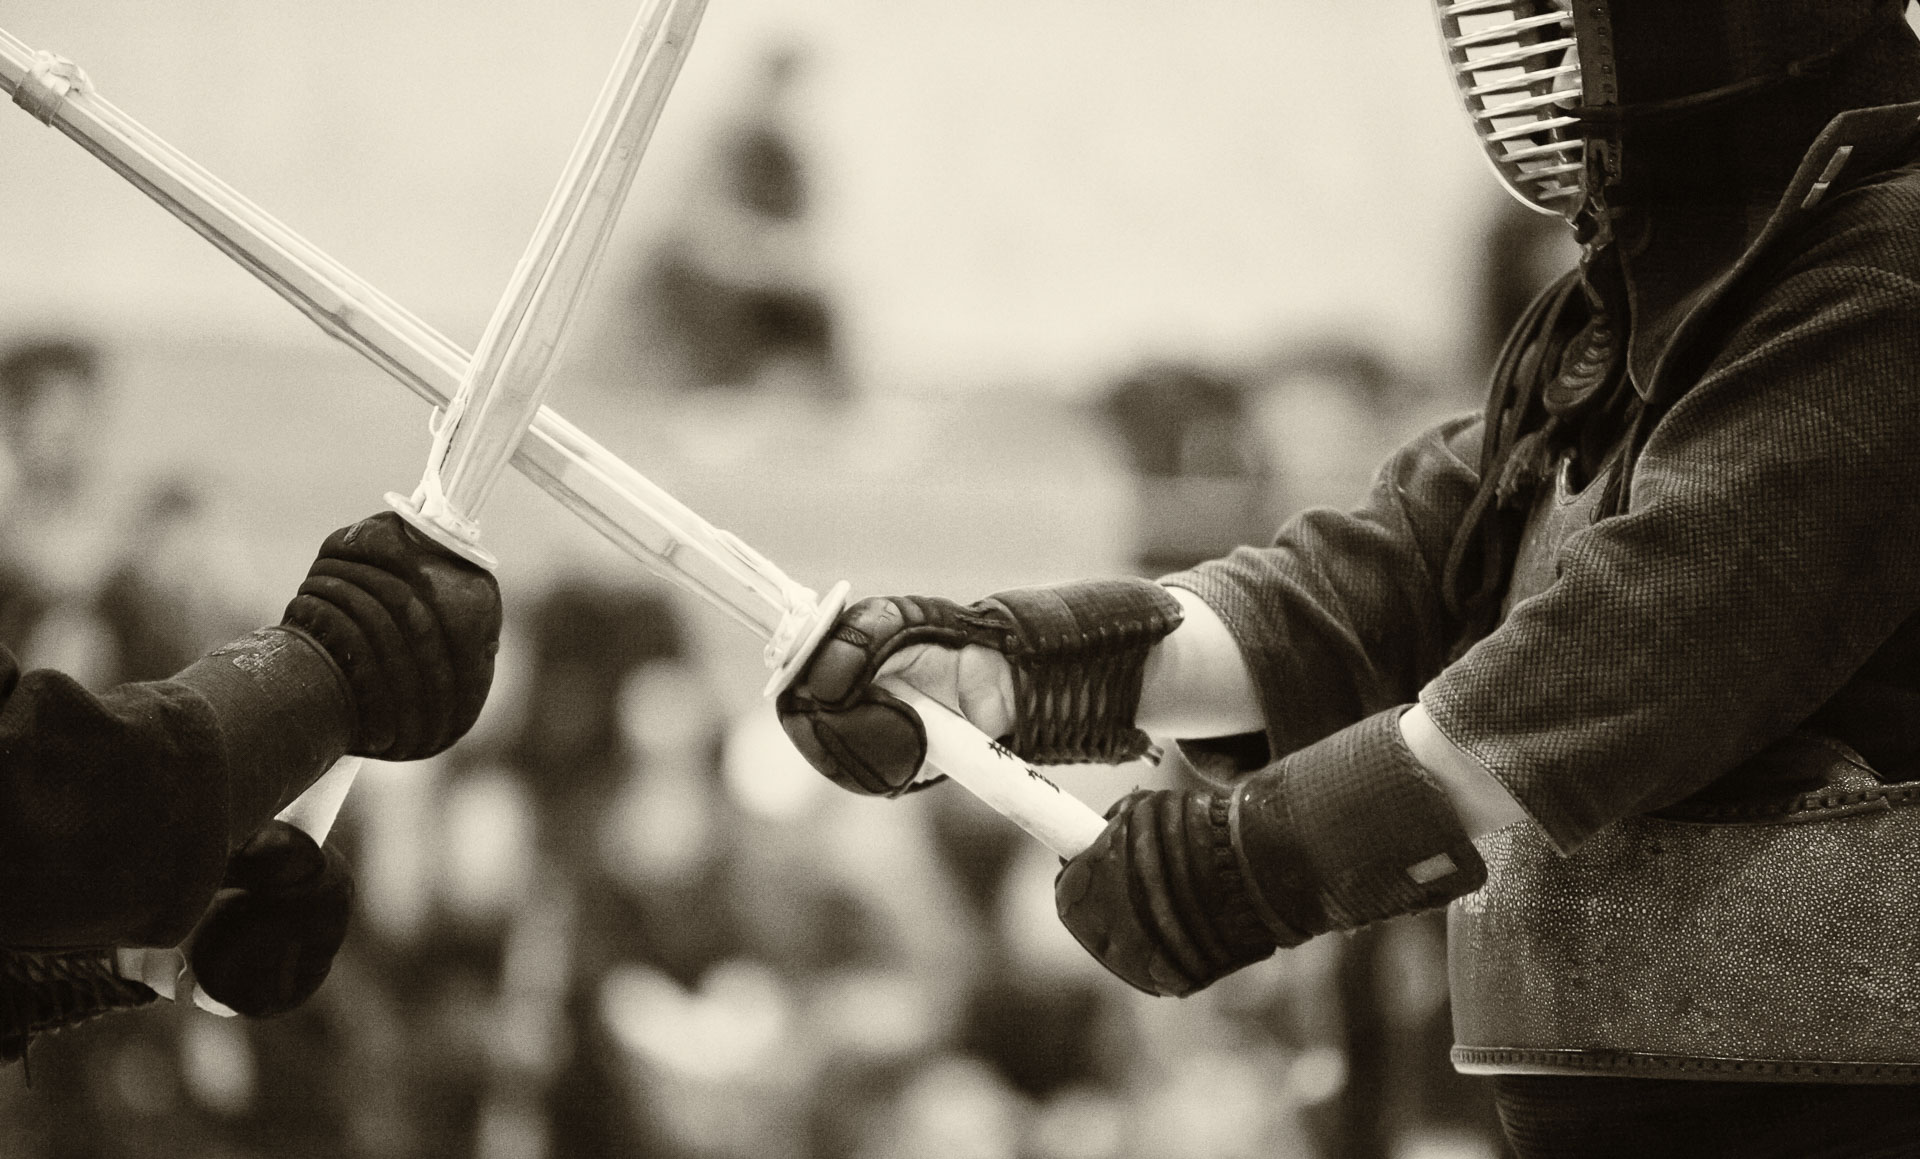
It is the same with my practice of kendo. Taking pictures of matches and practices is not only interesting from photography point of view, but also allows me to study kendo more deeply. In fact, I wrote about balancing these perspectives in this post.

I believe that if we look at our activities closely enough, we find that there is no such thing as multitasking. Having said this, we do variety of things in our lives, and sometimes certain activities, skills or interests enhance our experiences in other areas.

AA5Q2857_07-25-2014.jpg

Selecting photos for contest

AA5Q9249_02-08-2014-Edit.jpg

Selecting my favourite kendo photos for a photo contest turned out to be more difficult than I thought. First of all, I realized that I did not have that many photos of kendo. This is largely because practicing this Japanese martial art (any martial art, for that matter) and photographing it are mutually exclusive. Still, I have a few shots from tournaments, taken after I had been quickly eliminated from competition.

Keeping in mind that the goal of the contest is to produce a calendar for fundraising, I was looking for high-impact shots, not necessarily those that would be interesting from the standpoint of studying kendo. Also, I wanted to submit a uniform-looking selection, so I decided to convert all submitted shots to black-and-white (or monochrome, to me more precise). Actually, I found that a present called “Yellowed 2” from Nik’s SilverFX 2 plugin works well for kendo photos (after removing the image border).

Converting to monochrome also serves two other purposes: it reduces appearance of noise and it removes distractions from the background. Kendo matches are usually held in school gymnasia, which are painted in colours that are quite horrible for artistic photography. Also, it is next to impossible to avoid the spectators in the background, who wear clothes of all sorts of colours. Even is they are out of focus because of the shallow depth of field (I used Canon EF 70-200mm f/2.8L IS USM lens wide open), the distracting colours are still there. Converting the photos to B&W makes the background colours uniform, which enhances apparent subject isolation.

So my contest submission is done. Would it be nice to win? Sure! After all, the first prize is a ticket to the World Kendo Championship in Tokyo. Wouldn’t it be nice to say: “I was selected to go to the WKC!” Oh, the irony… As I said, kendo photography and kendo practice are mutually exclusive.

POIMG_2924_02-23-13-Edit.jpg

Family Christmas card idea

AA5Q1271_11-20-2014-Edit.jpg

This year, we wanted to take family photos that we could use for a printed Christmas card, but did not want a formal, “studio” look. My wife and I took some photos of each other and our daughter, while we were painting wooden Christmas tree decorations in our living room. The photos were not strictly “candid”, since we were aware of the camera, but we used only ambient light to imitate the candid, spontaneous photo style.

The lighting was quite dim, so the photos turned out quite noisy. This is Ok, however, since the prints are going to be very small, so they can handle quite a bit of noise reduction in post-processing. We used a Canon EF 35mm f/1.4L USM lens on a 1D X camera body. I set it to a manual mode with f/1.4, 1/200 sec and auto ISO. I found that our daughter moves sufficiently fast, and the camera with the 35mm lens needs to be sufficiently close to her, that a slower shutter speed gives too much motion blur.

For a group portrait of all three of us, I set the camera on a tripod and used a 10 sec timer. After a few tries we got a decent shot, but shooting with the wide aperture gave a narrow depth of field, and our daughter ended up being slightly out of focus. Hopefully, this will look Ok in a small image on the card.

A really precious and unexpected moment for us happened when our daughter walked over to the camera that was sitting on the tripod and started taking photos of us. Below is her very first photograph. As a parent, I am biased, naturally, but I like it!

AA5Q1506_11-20-2014.jpg

How much processing is enough

5DM2_MG_5491_10-28-12-Edit-Edit.jpg

When doing artistic image processing, knowing when to stop is important. In a non-digital world, for example, when painting, continuing to paint beyond a certain point could actually ruin the picture. The colours would become dirty and lose vibrance. With a digital image, there is always a possibility to undo the last action, so as long as the versions are saved regularly, there is no danger of losing all the work. However, there is certainly a point of diminishing returns, when doing a lot of work results in progressively less and less noticeable changes in the image.

I find that some image adjustments are almost always worth doing. They are cropping, colour balance and exposure adjustments. Playing with them does take some time, but the results are significant and there is a good chance of drastically improving an image by playing with these tools.

On the other hand, more detailed work, such as local dodging and burning, using a Liquify tool in Photoshop, skin smoothing in portraits, etc. is not always necessary. Of course, the more work you put in the image, the better it ultimately becomes, but the return on the time investment decreases. There is one counter-argument to this, though, which is quite significant to me. When I spend time working on an image, I am not only investing time in improving it, but also in learning new skills and techniques. In the long run, this makes me more efficient overall. I learn which methods work or don’t work for certain types of images. I also learn to apply various methods faster.

Generally, whether an image is over-processed or not is a very subjective question. I believe that in order to make a photo unique, I have to touch most of its pixels with a brush (I use a Wacom graphics tablet) at some point in the editing process. Having said this, time is a very precious resource, and while I am doing fine tweaks, which might not be noticed by anyone, except myself, I am not doing something else, for example, shooting more photos or learning new techniques. In my experience, the “optimal” stopping point in post-processing is actually not a true optimum, in the optimization theory sense of the word. Rather, it is a bit of a moving target. Finding the balance between under- and over-processed image is like riding a bicycle: sometimes, I lean more one way, sometimes – the other. The important thing is doing it consistently and avoiding extremes.

IMG_6806_06-17-13-Edit.jpg

Time management for photo projects

AA5Q1137_07-08-2014-Edit.jpg

Sometimes, when a photo shoot results in a couple of thousands images that need to be sorted through, post-processed and deliver to the client, time management becomes an issue. For me, photography is a part-time pursuit, so finding time to move the large projects along is an issue, which I continuously deal with. Lately, I found it effective to adopt an approach that I’ve been using in my work as a professor – working in brief regular sessions.

This concept applies to so-called “deep work” – something that needs to be done and is fundamentally important (such as doing research and reading technical literature), but that is not urgent and “in your face” (such as answering email and attending meetings). I first learned about it from a book called “Tomorrow’s Professor: Preparing for Careers in Science and Engineering” by Richard M. Reis. He describes that people, who are productive academically (read: publish many research papers) trend to work in brief, regular sessions. There is nothing surprising in this (it’s kind of eating an elephant one bite at a time), but in Reis’ observation, both words “brief” and “regular” are important. Brief work periods help avoiding burnout, and regular sessions ensure that progress is being made (otherwise, lots of time would be wasted to re-start the project at the beginning of every session).

For my photo projects, I try to adapt the same principle, particularly when some creative image editing is required. I work on a couple of images every day, as a way of taking a break from other tasks. This way, I can engage and have fun with the photos, and it doesn’t feel like work. After all, someone said that starting a photo business is a sure way to kill a perfect hobby, and I am determined to avoid that.

AA5Q9232_06-19-2014.jpg

Photographing newborns

AA5Q2904_10-28-2014-Edit.jpg

Newborn photography is a very popular genre because it represents a major emotional milestone for any family. Overall, babies are easy to photograph, compared to toddlers, for example, but there are a few points that I keep in mind to improve the images and the photo shoot experience (which is probably at least as important for the young family as the photos themselves):

  • The best time to for a newborn portrait is within the first ten days of their life. After that, babies lose their natural curled-up posture, which makes iconic images of a sleeping child so cute. The first couple of weeks are also some of the busiest for the new parents, so it’s good to plane the shoot in advance.
  • It’s important to keep the room very warm (barely comfortable for adults) – babies get cold very easily.
  • Babies’ eyelids are very thin, so the flashes can disturb their sleep. The opportunities to capture the “sleeping baby” photos may be few. Of course, there is an option to shoot with natural light, if there is a large window in the room.
  • Post-processing is a must. Baby’s skin is not a smooth as we are used to think. In fact, it is spotty, scaly and translucent, showing all the tiny blood vessels. It is also very red, compared to an adult’s skin tone (I am talking about a white baby here – different races would have their own differences).

Overall, I think newborn portrait are a lot of fun, particularly because of the opportunity to capture the emotional connection of the adults and the newest member of the humankind. Taking this king of photos always feels like a privilege.

AA5Q2887_10-28-2014-BW.jpg

Shooting hockey: dealing with low contrast

AA5Q2133_11-21-2014.jpg

At yesterday’s ice hockey game, I used Canon EF 300mm f/2.8L IS USM lens to shoot the action through transparent plastic panels that surrounded the rink for safety of the fans. The panels were covered with scuff marks from the puck hits, which did not interfere with focussing, since the lens hood was, practically, touching the panels. However, the resulting photos showed significant loss of contrast.

I corrected the images in Lightroom by moving “Blacks” slider to the left until the black levels are clipped (around -75 in most of my images). To compensate for the large amount of light reflected from the ice surface, the “Highlights” slider also has be moved to the left (my typical values were around -50).

Generally, I found that the 300mm f/2.8L lens worked well on a full-frame camera (Canon EOS-1D X). A friend of mine was shooting with a Canon EF 70-200mm f/2.8L IS II USM lens on his Canon EOS 7D Mark II (with a crop sensor), which gave him more flexibility of a range of focal lengths without sacrificing the reach at the long end of the zoom range.

AA5Q1955_11-21-2014.jpg

Retouching portraits of children

AA5Q1187_11-15-2014-BW.jpg

Retouching children’s portraits requires a surprising amount of skin smoothing. Baby’s skin is a proverbial reference for smoothness. This is why it is expected that skin in a child’d portrait would be impeccably smooth. In reality, children have very thin, quite translucent skin, so an unretouched portrait shows variations of colour, as well as small blood vessels under the skin. While this image is technically accurate, it appears unnatural, because of our expectations of smooth baby skin.

AA5Q1059_11-15-2014-BW.jpg

I have just finished post-processing a series of photos that my associate Armando and I took last week for an advertisement campaign of a dance school. I used Portrait Pro Studio 12 – a retouching software that can be called as an add-on from Photoshop. I found that the default settings for a “girl under 12 years old” result in too much processing for my taste. Through some trial and error, I found that these global tweaks give more reasonable results:

  • Turn off face sculpting and lighting effects. Children’s faces are rather round and flat; the Portrait Pro algorithms for enhancing the shape of the face detract from these features.
  • Reduce the default amount of skin smoothing (controlled by the Master Fade slider under Skin Smoothing Controls) by half.

Before applying the Portrait Pro filter, which appear on a separate layer, I make a stamp visible layer underneath it (create new layer, then press Shift-Option-Command-E). This way, if at a later point I decide that the retouching effects are too strong, I can reduce the opacity of the layer containing them to tone them down.

Photo backdrop materials

5DM2_MG_5456_10-20-12-Edit.jpg

A good background can greatly enhance a studio photo, whether it is a portrait or a still life. Generally, I try to select a background that ether complements or contrasts with the subject in terms of colour, tone and texture. In terms of material, here are the typical choices, with their advantages and limitations:

Paper

Paper is the least expensive material. It is available in many colours and is a better choice than fabric if you want a smooth background. It is definitely the most versatile material, particularly white paper, because it can be made grey, by limiting the amount of light shining on it, or any other colour by illuminating it with a spot light with a coloured gel on it. On the other hand, black paper is not as good as fabric for creating a solid black background, since it is more reflective.

The disadvantage is that paper gets dirty and wears out relatively quickly (from models standing on it). It can be argued that considering the cost of replacement, paper is the most expensive choice over a long time. However, the dirty part of the paper would be only under the models’ feet, where it is typically not very noticeable in the photos. Also, I have learned about a hack (is it the new work for “trick”?) of using a 4′ x 8′ of glossy white wallboard from a home improvement store as the surface for the models to stand on (the paper would be underneath the plastic). The line where the paper and the plastic meet would not be visible in the photo, since the paper curves under the plastic sheet.

5DM2_MG_0725_05-10-12-Edit.jpg

Fabric

Cloth backgrounds are slightly more expensive than paper. They can be changed very easily, and are more durable than paper, but it’s not recommended to stand on them.

Fabric is the material of choice for the black background. Conversely, it does not work well for solid white background – you would need ridiculous amounts of light to blow out the shadows on the tiny wrinkles. With white or grey fabric, any colour, except for very saturated colours,  can be created by using spotlights with gels. I also like mottled cloth backgrounds: I have one in cool grey and one in warm brown colour. I find that it’s almost necessary to blur the fabric background by using shallow depth of field.

Another feature to consider is the amount of storage space the background requires when not in use. If you don’t have  a dedicated studio space that is set up for photography all the time, then fabric backgrounds take the least amount of space when folded for storage.

Vinyl

Vinyl backgrounds are heavier and more durable, but also more expensive. They crease easily and slippery to walk on.

support stand is needed for any type of background, and in case of fabric, some clamps are very handy.

Note: While green or backgrounds are commonly used for composite video, it is much better to use a grey background for composite photos. The reason is that a green background would cast a very unnatural reflected light on the edge of the model (e.g. the tiny hairs on the skin), and it would be very difficult to make a selection in Photoshop to get rid of this green edge light.

My iPhone camera apps

Autumn tree

Here are the camera apps I currently have on my iPhone 5, which has been my pocket camera for the last couple of years. While I would not want to shoot a serious project with it, it is invaluable for capturing fleeting family moments and quickly sharing them with friends on social media. There is a great number of third -party camera apps for the iPhone, but to me personally, the deciding factors for choosing a particular one to use are

  • easy access to my most used features, and
  • intuitive interface (because I want to use the phone camera to capture the moments, not fumble through menus and settings).

For those reasons, I have these thee apps on my front screen.

Camera (native iOS app)

The native iOS app for controlling the camera (intuitively called “Camera”) has been greatly improved in iOS 8.x. I particularly like the integration of the image editing tools, which makes basic, high-impact adjustments, such as cropping, easy and intuitive.

In terms of managing of the photos, everything captured by Camera automatically goes to the Photo Stream in the iCloud, which I look through every month or so and pull the best shots in to my Lightroom library, which serves as the reference for my archives.

Camera+ ($1.99)

This is my go-to app, primarily because of its ability to set the focus and exposure points separately by dragging their icons on the screen. There is also an on-screen exposure compensation slider that lets you adjust the overall exposure. However, this is just a software feature, rather than an aperture/shutter speed/ISO adjustment found on a DSLR camera. Thus, I prefer to leave the exposure correction to the post-processing step in order to keep things simple and quick during shooting.

ProCamera ($4.99)

This app also has the separate exposure and focus settings, which is the must for my style of shooting. In addition, it has an ISO Boost mode, which raises the maximum ISO from 800 to 3200, allowing faster shutter speeds. Also, if the lash of the phone is set to torch mode, the intensity of the light can be adjusted. Note that the torch mode is a huge drain on the iPhone’s battery. In addition, there is a Night Camera mode, which allows exposures as slow as 1 sec. One really needs a tripod for this kind of shooting, which kind of defeats the purpose of a super-compact, pocket camera. In ProCamera, you can specify the level of JPEG compression (or save the photos in TIFF format), and the volume buttons of the phone can be used to trigger the shutter.

I am looking forward to receiving my new iPhone 6 Plus, with its new and improved camera hardware. My goal is to take iPhone photography a bit more seriously and,  through practice, determine a set of conditions/situations where the phone camera can reliably produce good results. I have a sense that I will be using more and more of the post-processing features of the phone. Normally, I avoid heavy processing of my photos, but for the iPhone shots, the artistic filters are half of the fun. The image quality of the original photo is often not particularly high, compared to that taken with a full-frame pro DSLR, which often releases my creativity.

Generally, looking at and reading about the work of others has been invaluable for developing my own skills. Recently, there emerged a vast body of resources on iPhone photography, such as this book that brings together variety of styles, subjects and software tools use by some of the best artists in this field.

Sun rays filtering through tree branches in Mount Douglas Park. Victoria, BC, Canada.