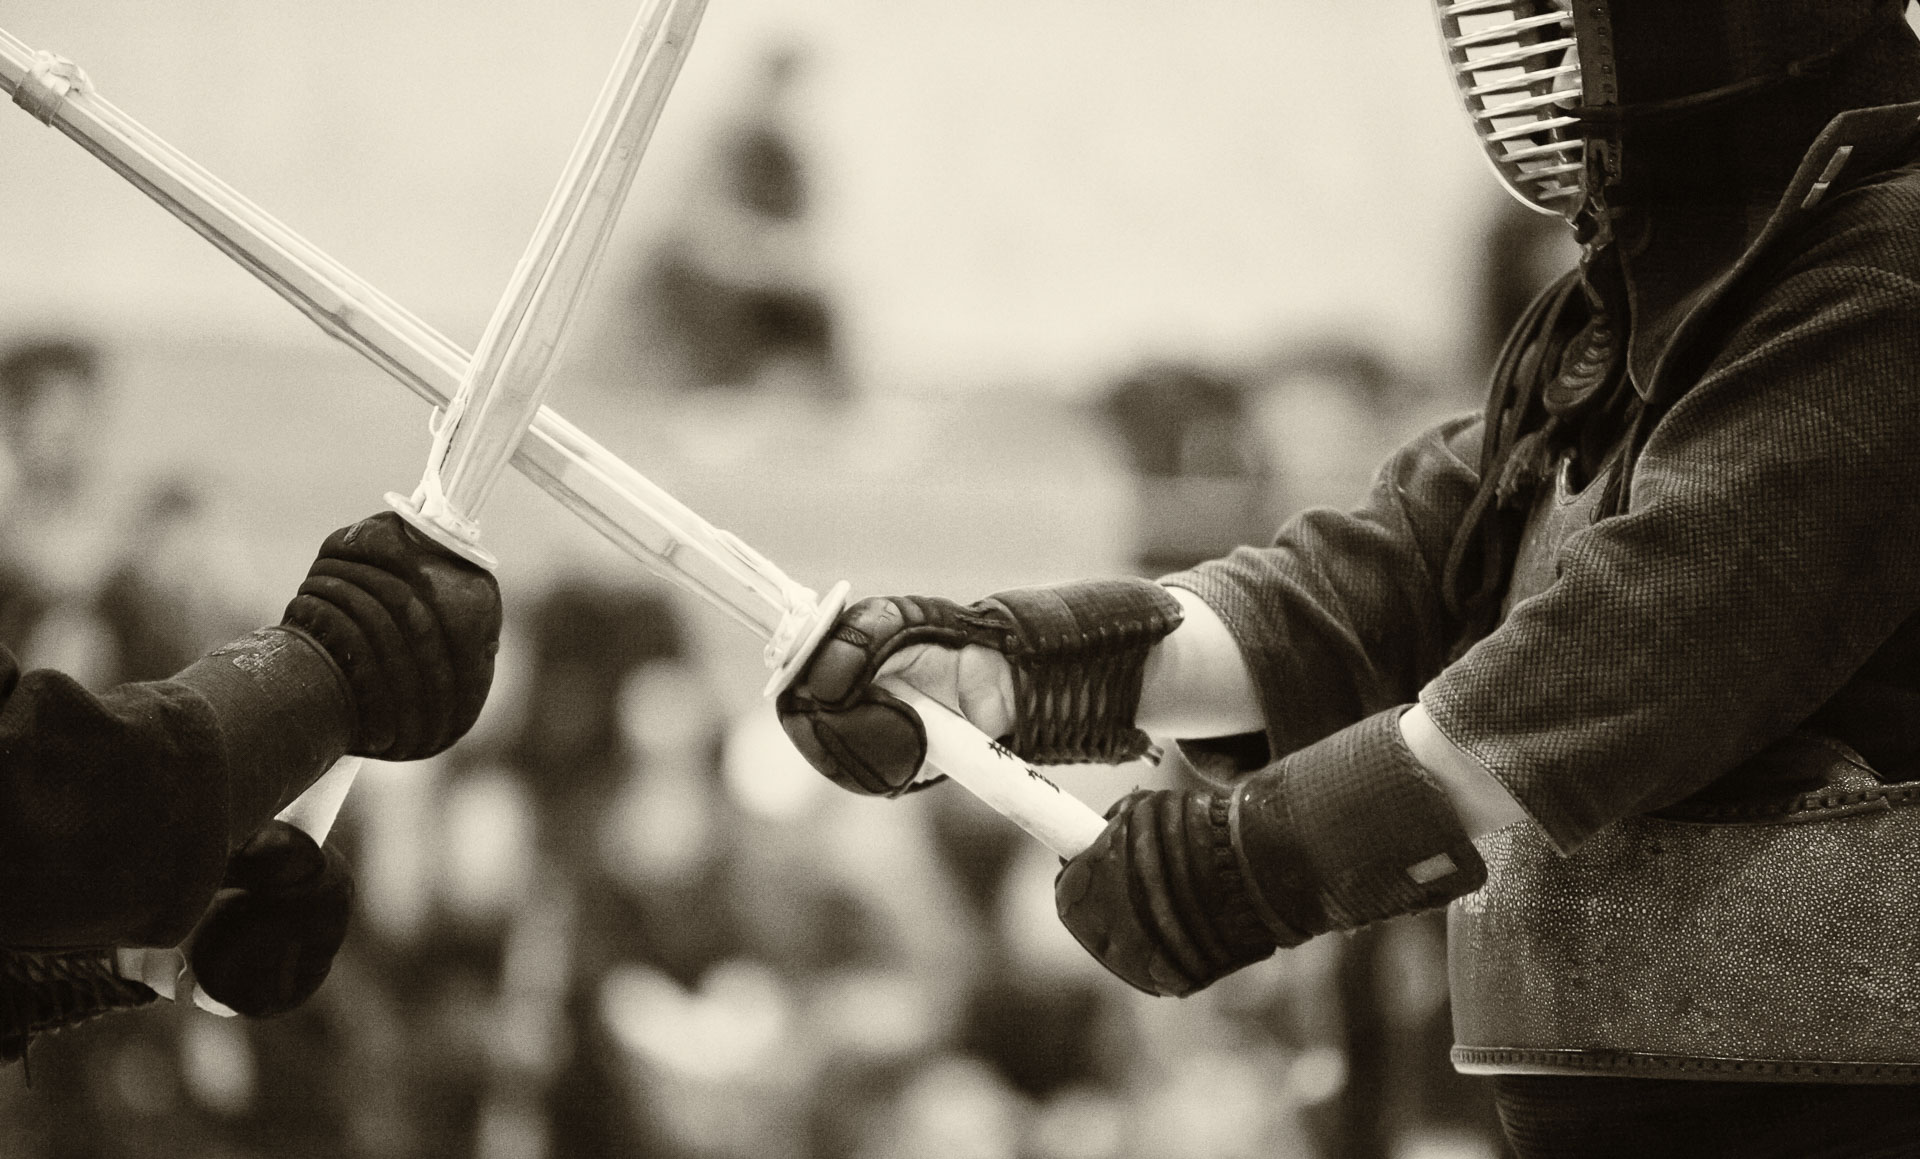
Photographing kendo: artistic imaging vs reportage approach

AA5Q9337_02-08-2014.jpg

I have been practicing kendo for several years, and it has been a big part of my life. When I photograph it, I often have a conflicting view: as a photographer, I want to create an artistic expression of what I see – an image that would be appealing to any person, even someone who does not know much about kendo. As a kendoka, I want to document the technical aspects of the match (shiai) or practice (keiko).

AA5Q9424_02-08-2014.jpg

The latter, documentary approach is relatively straightforward as far as photography is concerned. The image needs to be technically acceptable (i.e. reasonably sharp and correctly exposed) and it needs to show both opponents. Ideally, the photo would also capture a critical point in a particular kendo technique (wasa), such a moment when one kendoka’s bamboo sword (shinai) connects with the target area of the opponent’s armour (bogu). There are other stages of a wasa that are equally important, but for some reason, as someone  who practices kendo, I am looking for the moment of the strike (datotsu) in a photograph. I also would like to see the distance between the opponents (ma-ai), positions of their feet and hands, and to have a sense of balance and timing in their technique.

The problem is that photographs like that, which are good reference material for kendo practice, are often not particularly artistic or even visually appealing. It is difficult to define what makes an exceptional image. Recently, I heard somewhere a formula for a great photo (by Robert Capa?), which, being an analytical person, I really like. Here it is:

A great photo must possess at least two of the following three components:

  • Motion
  • Emotion
  • Some other aspect being extraordinary (e.g. colour, lighting, pattern, composition, famous subject, etc.)

For kendo photos, the first aspect, motion, is relatively easy to achieve – after all, the action is very fast and explosive. Capturing emotion is a bit more difficult. Being a martial art (budo) and not a sport, there are no celebrations of victory after matches in kendo. During the matches, the face masks (men) obscure the facial expressions of the opponents. I try to convey the emotion of the opponents by zooming in close on their faces or by focussing on the emotion conveyed by their body language.

Generally, when shooting kendo, I find myself alternating between the “artistic photo” mode and the “technical kendo” mode.

More photos on Flickr: http://ow.ly/xvxoDComplete set: http://ow.ly/xvxro

In terms of gear, I use a professional DSLR (Canon EOS-1D X) with either an Canon EOS-1D X (good focal length for capturing both opponents and great in dimly-lit dojos, but difficult to focus, as I described in this post) or a 70-200mm f/2.8L IS II USM lens (great flexibility for both overview and close-up shots, but not very wide aperture = relatively noisy photos). Next time, I would like to try a 300mm f/2.8L IS USM lens. It won’t do much in terms of documenting kendo techniques, but could produce some dramatic close-ups.

Carrying a DSLR with a long lens

AA5Q1832_10-04-2014.jpg

During some sporting events, photographers are not allowed to move along the the side of the playing field, as it is the case at the MLS soccer games, for example. In such cases, using a monopod or even a tripod (if it is allowed at the stadium) is a great idea, as it reduces the camera vibrations and helps to keep the frame level with the horizon, not to mention that it reduces the stress on your arms, as telephoto lenses are quite heavy.

However, if moving around is allowed, it can add great variety to the shots and often makes the difference between a rather boring and an exciting photoshoot. In my experience, hand-holding a lens longer than 400 mm is  simply not feasible due to the weight of the system and the amount of camera shake. Attaching the system to a monopod is the solution in this case.

http://ow.ly/DItik

I often shoot sports with a Canon EF 300mm f/2.8L IS USM lens, sometimes combined with a 1.4X tele-extender, attached to a Canon EOS-1D X body. I also carry a second camera body (5D Mark II) with a shorter lens, such as a Canon EF 70-200mm f/2.8L IS II USM, which I switch to if the action comes close. I carry the 1Dx-300mm system on a Black Rapid Y-strap over my left shoulder, so that the camera is at my right hip when not in use. The second camera with a shorter lens is on my left hip, attached to a SpiderHolster. My Spider carrying system has another holster on the right side, but the 300mm lens is too heavy for it. In fact, my friend tried to carry a 300 mm lens in a Spyder and found later that the pin that attaches the camera mounting plate to the belt became bent because of the weight. I suppose, this is not the worst that could have happened. At least, the pin did not break and the camera did not fall!

Initially, I was not keen on using the SpiderHolster, but I really like how the camera that is attached to it rotates and does not hit the ground if I crouch to take a low-angle point of view, which, by the way, almost always works better for sports than shooting from a standing position.

As an alternative, sometimes I use only one camera and lens at a time. I would switch lenses couple of times throughout the game to take a variety of view angles. In this case, I carry the camera on a Y-strap. It gives a good combination of mobility and weight distribution.

12280085295_f636ebb59c_o-small

Using highlight tone priority in a Canon DSLR

More photos here: http://ow.ly/DGvOp

Recording only JPEG images during a long photoshoot has many advantages over keeping the RAW images, but the main drawback is the loss of flexibility in adjusting the exposure in post-processing. When shooting RAW, even if the photo is incorrectly exposed, it is often salvageable in Photoshop or Lightroom. With the JPEG files, if the photo is over-exposed, the highlights cannot be recovered after the fact. I usually enable the highlight alert in my camera, so that any over-exposed areas in the photo appear as blinking white/black light when displayed on the LCD screen. By monitoring the highlights, I adjust the exposure as I shoot.

Sometimes, the dynamic range of the scene (the difference between the dark and the light areas) is too large for the camera too handle, so some loss of information in the recorded image is inevitable. This was the case during the first day of the Canadian University Rowing Championship last Saturday, when the bright sun was reflecting off the surface of the lake, and the rowers appeared as dark silhouettes. To minimize the over-exposed areas, some image processing can be done in camera, at the time of shooting.

In Canon DSLRs, such as my 1D X or the very popular Rebel T5i or 70D, there is a function called “highlight tone priority”, which accomplishes this. Nikon DSLRs have a counterpart called “active D lighting”.

Screenshot 2014-11-03 22.24.35

The highlight tone priority can be activated as follows (the instructions are also on page 156 of the 1Dx manual):

  • Press <MENU>;
  • Select the second tab in the Camera group of menus (see picture above);
  • Select [Highlight tome priority] and press <SET>;
  • Select [Enable} and press <SET>;
  • Take the picture.

As a side note, the JPEGs can still be adjusted, to a degree, in post-processing. For the rowing pictures, I used a combination of in-camera- and post-processing. The photos ended up being contrasty, but I think it generally works well for sports images.

More photos here: http://ow.ly/DGvOp

Photographing rowing from a boat

http://ow.ly/DItik

Today, I was shooting the second day of the Canadian University Rowing Championship at the Elk Lake. Armando and I were the official photographers of the event, so we had a dedicated boat that took one of us close to the racing boats (the other was shooting from the dock). Together with me in the boat was another photographer named Kevin, who is a former rower himself, and not just any rower, but no less than a national team member and a gold medalist. He has been shooting rowing for a while and had a very specific idea about types of shots he wanted to get, but a bit concerned about falling out of our little catamaran. The previous day, I was sharing a boat with another photographer, a young lady from Netherlands, so I knew that the boat was perfectly capable of carrying two photographers. I was also happy to learn more ways of making a series of rowing photos less boring – after all, rowing motion is very repeatable, which does not give a lot of variety of poses (although facial expressions of the athletes vary quite a bit!).

http://ow.ly/DItik

Over the course of several races, we refined a strategy that allowed us to capture a variety of shots. As the race started, we would wait at the side of the course at the half-distance mark. As the boats rowed past us, followed by the boats carrying the officials, then, we would cross into the middle lane and follow the rowers. Kevin and I positioned ourselves on both sides of the boat driver, shooting, literally, over both his shoulders. We both had Canon EOS-1D X cameras. I used a 300mm f/2.8L IS USM lens with a 1.4X tele-extender and Kevin had a 600mm f/4L IS II USM. The key point, which took us couple of runs to figure out, was to drive the boat between  and just behind the two official’s boats, but in front of the point where their wakes intersected. This way, we avoided most severe wave vibrations. Another note is that men’s 8+ boats were fast enough to actually outrun our motorboat, which was kind of cool to watch.

As the rowers approached the finish line, we would ask the driver to kill the engine and drifted to take the shots of the athletes celebrating their victories. Then, we followed them to the dock and took some shots of the coaches greeting them after a cool-down lap.

Later, I shot some moments of celebration by the winners from the dock. Most notable was the throwing of the coxswain in the water by his grateful teammates.

It was long weekend, but an interesting experience of learning the dynamics of the rowing race and following it from the athlete’s perspective.

http://ow.ly/DItik

Best Canon lens for basketball photography

AA5Q6408_11-01-2014.jpg

During today’s basketball games, I experimented with four different L-series lenses. I used all of them on a Canon EOS-1D X DSLR with ambient light (no flashes). I shot them wide open, i.e. at the maximum opening of the aperture (minimum f-number). Here is the breakdown of their advantages and limitations.

1. Canon EF 85mm f1.2L II USM lens
(see photo above)

This is the fastest lens of the four I used, and it is my top choice for shooting indoor basketball for this very reason. It gathers enormous amount of light at f1.2, and thus allows shooting at moderate ISO even when the shutter speed is quite high (around 1/1000 sec). This, in turn, results in low noise. Another nice feature is the ability to separate the subject from the background due to incredibly shallow depth of field.

The main disadvantage of the 85mm f1.2L is that it focusses very slowly compared to the other three lenses. It takes a lot of practice to learn how to follow the subject by continuously “riding” the focus button. Because of the slow focussing, this lens produces the highest number of outtakes. However, when it does focus, the result is spectacular.

2. Canon EF 35mm f/1.4L USM lens

AA5Q6278_11-01-2014.jpg

This lens is also very fast, and it offers a unique, wide-angle perspective with little distortion. It also focusses very fast.

Te main disadvantage is its short focal length. It is simply impossible to photograph close-ups of the players with a 35 mm. Another related limitation is that the depth of field is quite large, even at f1.4, so subject isolation from the background is not as prominent as for the other three lenses.

3. Canon EF 300mm f/2.8L IS USM lens

AA5Q6089_11-01-2014.jpg

This lens is the opposite of the 35mm f/1.4L in that it only allows the close-up shots. The focussing speed is superb, and the background blur (bokeh) is very pleasant.

The main limitation is that the field of view is so narrow, that it is quite difficult to frame the moving subjects. Like the 85mm f1.2L , it takes a lot of practice to achieve useable results, but the few successful photos are impressive.

4. Canon EF 70-200mm f/2.8L IS USM lens

AA5Q5933_11-01-2014.jpg

The main advantage of this lens is its zoom range. It is incredibly easy to frame the action. The lens also focusses lightning-fast, and it is very sharp.

The main drawback of the 70-200mm f/2.8L is that, like the 300mm f/2.8L, it is not as fast as the other two lenses (max aperture is f2.8), and therefore produces relatively noisy photos.

So, which lens would I choose if I could only bring one to a basketball game? It depends on the level of experience. For a novice photographer, I would recommend (if cost is not a factor – all this lenses are very expensive anyway!) the 70-200mm f/2.8L. It would give the highest success rate and flexibility. My personal favourite right now is the 85mm f1.2L , despite being the most challenging lens to shoot.

Shooting portraits by the bonfire

AA5Q3263_10-31-2014.jpg

It is Halloween time, and tonight we visited the huge Oak Bay bonfire organized by the local firefighters. Photographing people by the fire is challenging, and the camera settings depend on whether the light source, i.e. the bonfire, is in the frame or not.

If the fire is not in the picture, but simply shines the light on the subject, such as in the photo above, the basic concepts of shooting in low light apply. One needs a fast lens (one with a low minimum f-number) and a camera with good low-light performance. My wife used a Canon EOS-1D X with a 35mm f/1.4L USM lens.  I usually just let the camera expose correctly for the subject and not worry about the background, which will come out either over-exposed (if it is still twilight) or under-exposed, if it is already dark. In either case, it can be ignored if it does not contain anything of interest.

On the other hand, if the fire is in the background, in other words, if shooting against the light, the dynamic range of the scene (the difference between the lightest and the darkest parts) is too great for any modern camera to handle. There is no choice but to add artificial light to the subject. An on-camera flash is far from ideal light source, but it is often the only choice in a given situation. This is what my wife used to take the image below. In manual mode, if the aperture and the ISO are fixed, the shutter speed can be used to control the exposure. When checking the exposure, it is important to look at the histogram, since images on the camera LCD screen appear much brighter than they really are.

AA5Q3289_10-31-2014.jpg

Another challenge of shooting with a flash, with fire in the background, is that the colour temperature of the two light sources is very different. The flash is daylight-balanced, while the colour of the fire is very warm (red-orange). One way to balance the image is to correct the colour of the subject in post-processing. In Lightroom, this can be done using a local adjustment brush, which is what I did for this image. In Photoshop, this can be done using adjustment layers applied to a part of the photo.

An alternative to correcting colours in post-processing is to use gels on the flash. A gel is, basically, a piece of a coloured plastic, which is attached to the flash by a rubber band.

Personally, I prefer leaving the colour correction until I can see the photo on a computer and can experiment with various effects. After all, the warm colour of a bonfire creates a special atmosphere that is worth preserving in the final image.

AA5Q3134_10-31-2014.jpg

How to deal with closed eyes in Portrait Pro

AA5Q2846_10-28-2014-Edit.jpg

I have been experimenting with Portrait Pro retouching software. It speeds up the process of skin smoothing and other retouching adjustments as an alternative of doing them in Photoshop.

The workflow in Portrait Pro is very intuitive and the learning curve is not steep at all. However, there are a couple of features that took me some time to figure out.

For example, sometimes the subject has closed eyes, such as in the shot of my friends’ newborn daughter (see above), whom I met a couple of days ago. The problem is that Portrait Pro insists on creating the outlines of open eyes once you have followed the directions and identified the position of the corners of the eyes.

The solution is to follow the step-by-step guide and specify the corners of the eyes (this defines the general outline and the angle of the face) and skip the eye outline adjustment steps by pressing Spacebar repeatedly. After finishing refining of the nose, the mouth and the overall face outlines, simply toggle off the Eye Controls group of adjustments at the bottom right panel.

Another feature comes into play if you want to retouch a skin area, which is not a face. In order to do this, press “Enhance Skin Only” button at the initial interface, below the gender and age selection buttons and paint in the skin area. However, this button is not shown by default. In order to activate it, you need to start Portrait Pro not as a Photoshop or Lightroom plugin, but as a stand-alone application. Then go to Portrairpro > Preferences > General and check the “Show “Enhance Skin Only” Button” checkbox.

In general, I find that Portrait Pro works very well, but to avoid a cookie-cutter, filtered look, I prefer to apply its adjustments selectively, only to certain areas of the photo. This can be done either by using layers in Photoshop, as I described in this post, or within Portrait Pro by using a Restore Brush.

AA5Q2800_10-28-2014-Edit.jpg

Malta: my first travel photography destination

LICENSED_CRW_5134_RT8_06-18-2005.jpg

The trip to Malta in June of 2005 is very special for me. It was a combined conference-followed-by-vacation trip, the first one of many that my wife and I took in the following years. The conference was the first one, which I attended for the first time as a professor, not a PhD student. The vacation that followed was the first one, where we specifically included travel stock photography on the agenda. We read travel guides, brainstormed shooting lists, and spend many fun hours tracking down the destinations. For the first time, we packed a DSLR (the original Canon Digital Rebel) and a professional-grade lens (Canon EF 70-200mm f/2.8L IS USM – the link is to the current, second generation.)

LICENSED_CRW_5145_RT8_06-18-2005.jpg

We learned a lot about travel photography from that trip, both in terms of technique and logistics. Looking to capture commercially-viable photos was a big departure from my earlier approach to photography, where my audience had been only our family and closest friends (and I don’t mean Facebook friends – this trip pre-dates social networking as we know it!) Looking back at the photos now, nine years later, I can see how different my style and subjects were from what they are today. The biggest difference is that I largely avoided including people in the photos, while nowadays, that are my main subjects. I believe this is a natural initial stage for many photographers – to focus initially on landscapes, architecture, nature, etc. before gradually progressing to portraits of people. “But I am not interested in shooting people!” was my honest statement at the time when I started doing photography seriously, which I often hear from other beginning photographers.

It takes substantial time to develop skill  and personal style in photography. One popular statement is that “the photos you take in the first 10 years of shooting are your worst.” On the one hand, I agree with it. On the other hand, some of my favourite photos are from that trip to Malta. Paradoxically, they have a lot of personal meaning for me, despite being shot for face-less stock consumers.
LICENSED_CRW_5200_RT8_06-18-2005.jpg

Advantages of shooting in JPEG format

AA5Q7277_10-25-2014.jpg

I usually take photos in RAW format to keep the ability to adjust exposure in post-processing. Having the large RAW files is particularly important for recovering over-exposed highlights.

However, having just completed a two-day photoshoot of a rowing regatta and two soccer games, I can definitely see the advantages of shooting JPEGs. I shot the rowing photos in RAW and the soccer ones as JPEGs as an experiment. Here are some advantaged of the JPEGs over RAW:

  • Obviously, the JPEGs take up much less disk space. This is particularly important in the case of sports photography, where I typically use a high-speed drive mode of the camera. My Canon EOS-1D X can shoot at 12 frames per second, which adds up to a couple of thousands of images per soccer game with my style of shooting (and I am trying to be selective and not to keep the shutter button pressed all the time!)
  • I can give some of the photos to the communication officer at the halftime without having to record two copies of the images (RAW+JPEG) or to switch file formats during the shoot.
  • Perhaps most importantly, large previews are generated much faster in Lightroom, which saves time during culling (selecting the images for publishing) and post-processing.
  • Finally, the JPEGs produced by modern DSLRs are very good. The noise is reasonably controlled while preserving sharpness, and the exposure is easy to monitor during shooting (by checking the histogram on the camera LCD screen) to make sure no excessive corrections would be needed in post-processing.

AA5Q0729_10-26-2014.jpg

Being engaged in the action: difference between professional and amateur photographers

Rock!

The main difference between sports, travel and event photographs shot by professionals and amateurs is the degree of involvement of the photographer in the action. When I started taking photographs of festivals, sporting events and people in the streets, my subconscious desire was to be a “fly on the wall.” I wanted to convey in my photographs a sense of the action without disturbing the participants or being engaged in the event myself. As I kept shooting this way, my technical skills grew, but it became apparent that it was the non-participant’s mindset that was limiting my progress.

Gradually, I became more comfortable becoming more actively engaged in the action that I was shooting. Part of this is just technique. For example, it is often taught that in order to take better photos of playing children, the photographer needs to get to their level – lay on the floor or on the ground. However, a large part of this approach is mental attitude. If you enjoy the event itself, this notion will be conveyed in the photos, and the way to enjoy the action is to be genuinely interested in it and to interact with the other participants.

This active approach to photography, which distinguishes professionals from many amateurs, is a skill, and as such, it require practice to develop. (I hesitate to say “to master”, because from my experience in kendo, I have yet to see a limit to a particular skill that would qualify as “mastery” – there is always room for improvement.)
More photos on Flickr: http://ow.ly/xvxoDComplete set: http://ow.ly/xvxro

So what does it take in practical terms to take photos that convey engagement with the subject?

  • First, it means getting close to the subject. This implies genuine interaction, often with eye contact. There is no way to fake it.
  • Second, I take my best photos when I know the subject well. Again, this means genuine interest.
  • I try to take opportunities to shoot in difficult conditions in terms of weather or lighting. Doing so conveys willingness to share the challenging conditions with the participants of the game, event, etc.
  • To shoot in challenging conditions, I use professional-level gear (Canon EOS-1D X camera and L-series lenses, for example, a rugged and “fast” Canon EF 70-200mm f/2.8L IS USM).
  • Finally, there is a real advantage of actually being a professional. A media pass to an official event provides access to shooting positions and locations that are simply not accessible to the general public. So, what to do if you are attending an event as a spectator? Shoot what you can most easily relate to – other spectators, the setting,… convey the sense of your experience. And get to know the players/actors/organizers – this can lead to getting your own media pass for the next time!

AA5Q9249_10-04-2014.jpg